Tuesday 4 December 2012

2-in-1 Cupcake Mosaic

So we did a cupcake mosaic in class today, it was a 2-day project, the first day we made the cupcakes (3cm by 3cm)  and the second day we iced the cupcakes.
This
project was done in pairs and i worked with my twin (her blog here )
  This project is DIY cupcake design project where we design our own design, i wanted to do a turtle but noooo, Grace wanted to do something fangirly. (story below)


The recipe:

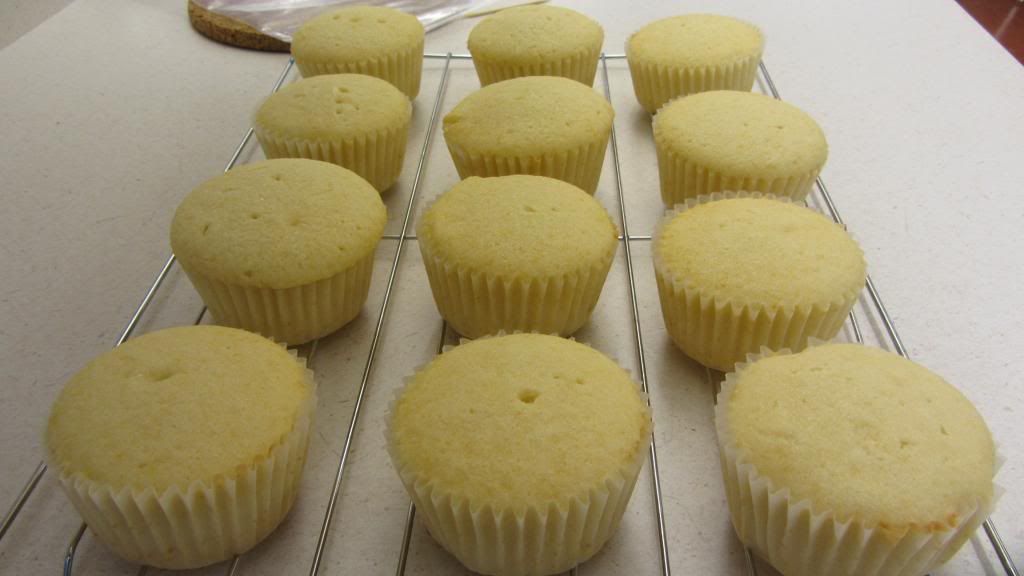
We used the yellow cupcake recipe for our cupcakes, which can be found here

and fo our icing, we used the Classic Buttercream Icing, which can be found here


Product
So anyways, Grace (my sister) is a in-the-closet 1D (one direction fan and <3 Niall)  and since i do whatever Grace says, and she said she wants to do a 1D cupcake mosaic, so we did and  since they are British and Nail is Irish so BAM a combination of a UK+Ireland flag (hence the title 2-in-1 cupcake mosaic

Left: Ireland Flag Right: UK Flag

to bad this ^ isn't a turtle :(


MINI HOUSES!

We are making gingerbread houses for food art. I personally don't like making gingerbread things since it is kinda annoying and takes forever!
well here's the recipe:


The recipe:

Ingredients:  

  • 250 mL Shortening
  • 25o mL sugar
  • 2 eggs
  • 300 mL molasses
  • 15 mL vinegar
  • 1370 mL flour
  • 5 mL baking soda
  • 5 mL salt
  • 5 mL ground ginger
  • 5 mL ground cinnamon
  • 5 mL fround cloves

Method:
  1. Cream shortening well.
  2. Gradually add sugar and cream well again.
  3. Beat in eggs, molasses and vinegar.
  4. Stir together 250 mL of the flour along with baking soda, salt and spices.                                        
  5. Gradually blend the first cup of flour and spices into the creamed mixture and mix well.
  6. Add another 250 mL of the flour gradually, blending well.                                     You may find that at this point the dough is stiff enough and the reaming flour may make the dough too dry and crumbly. Your dough should feel soft and workable but not sticky. If you think it had gotten too dry and crumbly then re-crumble into a bowl and sprinkle with a little water and work until it comes together and is workable.
  7. Gather the dough into a ball then flatten it into a dish and wrap it tightly with plastic wrap and put in the fridge if you are baking on a different day.
  8. Roll out the dough to 3mm thickness  (check with a ruler)                                                          *It may be easier to shape large, cut-out pieces of gingerbread directly on the baking sheet or onto parchment paper, so that the dough doesn't distort as you transfer if from the work surface.
  9. Cut into shapes.
  10. Place 2.5 cm apart from each other on parchment lined cookie sheets or jelly roll pans.
  11. Bake at 375°F or 190°C for 5-6 minutes or until firm and lightly browned.                       *Like any cookie, gingerbread is not crisp or firm when it first comes out of the oven: this means it may be difficult to tell whether it is cookies, particularly as cooking times vary from oven to oven. Generally, the dough will have risen slightly and will be just colouring around the edges. Do not under cook.
  12. Cool slightly on the sheet for about 5 minutes, in which time it will start to crisp, and then remove to racks to cool completely.                                                *If the gingerbread still feels very soft, return it to the oven for a few minutes.
  13. Very often the gingerbread will distort slightly during baking. If you wish or feel the need to trim it to reshape (especially for the houses pieces to fit properly), be sure to do it while the dough is still warm. If you allow it to cool and then try to trim it, it could break.
To store:
Large, flat pieces of gingerbread must be cooled and stored on a flat surface or they will become distorted. Use a box or try to store and in a ziplock bag. 

Finished Product

Well I made a log house, but i can't post a picture of it yet since i don't know where Grace put the camera and she isn't here right now and i still can't sync my phone to my computer ><"

i will post the pictures once Grace comes back home :)

Spider Web Cookies

The recipe (cookies):

Ingredients: 
  • 375 mL flour
  • 200 mL cocoa powder
  • 2 mL salt
  • 185 mL margarine
  • 300 mL icing sugar
  • 1 egg
  • 3 mL vanilla
Method: 

  1.  In a large bowl, sift together flour, cocoa, salt. Set the mixture aside.
  2. Use an electric mixer to cream the margarine and icing sugar until fluffy. Beat in the eggs and vanilla.
  3. Add the flour mixture; mix on low speed until thoroughly combined.
  4. Divide the dough in half; wrap in plastic wrap.
  5. Chill the dough for 10 minutes in the freezer.
  6. Heat oven to 350°F or 180°C
  7. Roll the dough out between two pieces of wax paper until about 5 mm thick.
  8. Cut out a tracer for the web shape from scale paper.
  9. Cut out each cookie.
  10. Place cookies on an ungreased cookie sheet and bake for 8-10 minutes (personally I couldn't really tell if it's ready or not because you can't tell by the colour)
  11. Cool completely on wire racks. 
    Finished Product (not yet decorated)
    The recipe (Royal Icing):
    Ingredients:
  12.  250 grams sugar
  13.  2 mL cream of tartar
  14. 15 mL whip powder
  15.  50 mL water 
  16. black food colouring/ 30 mL chocolate chips/ black icing paste
Method:
  1. Whip together the ingredients in a medium bowl
  2. To make the cobweb design, begin by icing the cookie with white royal icing. 
  3. To 50 mL of the icing add 30 mL of melted chocolate chips or black food colouring or use black icing paste. 
  4. Pipe out a spiral of black icing starting from the center to the edges of the cookies  
  5. Draw a bamboo skewer or use the tips of a sharp knife and drag it from the center to each point of the cookie, then from the inner curves back to the center.
    Voila! Spiddy cookies!

Classic Buttercream Icing

 The recipe:

Ingredients: 
  •  250 mL vegetable shortening (you can substitute with butter but makes sure you have the correct amount!)
  • 5 mL vanilla
  • 30 mL water
  • 454 g or 1000 mL icing sugar
  • 15 mL egg white powder
  • Food colouring
Method:
  1.  In a large bowl, cream shortening, icing sugar, egg white powder, vanilla and water.
  2.  Add the dry ingredients and mix on medium speed until all the ingredients has been thoroughly mixed together,
  3. Blend together for an additional minute until creamy.
  4. This icing can be refrigerated or you can freeze it. 
  5. For the piping of the icing, it depends on you.

    You can use the buttercream icing to decorate any thing you want, cake, cupcakes, poundcake......... we used the buttercream icing to decorate yellow cupcakes (recipe here


Finished Product
This one i made by Kelly! it's so pretty~
Cupcakes we decorated!


PUMPKIN CARVING :D

Just like the title says, in this lab we did pumpkin carving! It is a 2-day lab and we were supposed to buy our own pumpkin. My grandma choose my pumpkin since I can't make up my mind on which pumpkin i should buy, there were tons of pumpkins where i went!


Well i couldn't sync my phone into my computer for some reason....so i can't see you the process of my AWESOME pumpkin craving but i can show you......
I will upload them as soon as i can make my phone sync to my computer


THE END RESULT
MY AWESOME PUMPKIN! 

I must say that mine is one of the more creative ones since everyone did either a face or animal on there pumpkin


WAIT! There is MORE!When scooping out the seeds you can eat the seeds! follow the recipe below on how to roast pumpkin seeds! but before that remember to separate your seeds for the pumpkin gunk and rinse and dry them!


Roasted Seeds

Spicy
Ingredients:


  • 15 mL olive oil
  • salt
  • 1 mL Tabasco Sauce
  • 5 mL cayenne pepper
  • 1 mL cumin
  • 15 mL chili power
Sweet
Ingredients:
  • 15 mL olive oil
  • salt
  • 15 mL sugar
  • 1 mL cinnamon
  • dash of nutmeg
  • dash of allspice
Method:

  1. Preheat the oven to 350°F or 180°C.
  2. In a small bowl, toss together pumpkin seeds, olive oil, and all the spices; season with salt.
  3. Evenly spread pumpkin seeds on a baking sheet and transfer to the oven.
  4. Cook until toasted and fragrant, 10-12 minutes.
    Spicy Roasted Pumpkin Seeds


Yellow Cupcakes

This is paired up with the classic buttercream icing which is here

Ingredients:  


  •  375 mL cake flour shifted
  •  5 mL baking powder
  •  1 mL salt
  • 220 mL granulated sugar
  • 85 mL margarine
  • 1 egg
  • 5 mL vanilla extract 
  • 150 mL milk
Method:
  1. Preheat the oven to 350°F or 180°C.
  2. Line a muffin tin with paper liners.
  3. Sift together flour, baking powder and salt; set aside.
  4. Cream sugar and butter together until light.
  5. Add the egg and vanilla to creamed mixture and beat until thoroughly mixed. 
  6. Add flour mixture to creamed mixture alternately with milk, beating well after each addition. Continue beating for one minute but  be careful not to over mix!
  7. Scoop into the muffin tins. Bake for 18 - 20 minutes or until an inserted toothpick comes out clean
  8. Cool for 10 minutes in the muffin tins on the rack then remove and cool completely before decorating.
  9. You could freeze the cupcakes if you don't want to decorate them on the same day you bake them.
    Finished Product


    Finished Product

EDIBLE RAINBOWS!

Hi everyone! so this time in food arts we made rainbow cookies!! how awesome is that?? edible rainbows!!
The recipe:

Ingredients: 
  • 250 ml of margarine
  • 250 ml of sugar
  • 2 eggs
  • 5 ml of vanilla extract
  • 625 ml of flour
  • 5 ml baking soda
  • 10 ml of cream of tartar
  • 2 ml salt
  • Blue, Green, Yellow, Orange, Red food coloring
Method:


  1. In a large bowl, cream together margarine and sugar. 
  2. Add one egg at a time. Beat until well incorporated. Add the vanilla
  3.  Sift together dry ingredients in a medium bowl.
  4. Slowly stir the flour mixture into the creamed mixture.
  5. Divide the dough into 5 unequal amounts.
    Dividing the dough
  6. Mix in 2-3 drops of food colouring to each amount. (blue in smallest dough, red in the biggest etc.)
  7. Start by rolling the smallest ball into a snake (blue). Then roll out the next colour into a rectangle and cover the snake with the rectangle until all the dough is used up.
    Rolling the dough
  8. Put in the freezer for 10 minutes or until the dough hardens (you could put it in the refrigerator overnight too).
    How it should look
  9. Slice the cookies and then cut them in half and place on an ungreased cookie sheet. Shape them if you want.


    How the cookies looked when we sliced them

    The cookies cut in half. We shaped them a little with our hands


  10.   Bake in a 350°F or 180°C for 8-10 minutes
  11. Let it sit on the cookie sheet for 5 minutes and then move them to a cooling rack to cool


    FINISH!
    YUMMY RAINBOW COOKIES!


Monday 8 October 2012

Apple Craberry Loaf with Walnuts

So for our first lab in food arts we made a loaf, we got to choose what kind of ingredients we get to put into our loaf, and since i wasn't there when we got to choose Kelly, and my sister choose apple, walnuts and cranberries.  I personally think whoever chopped the walnuts chopped them to big ><" but other then that the loaf was pretty good considering i don't like apples.
The Recipe:


Ingredients:
1 apple (shredded and squeezed dry)
185ml walnuts (chopped)
125ml cranberries
310ml flour
185ml sugar
5ml salt
5ml baking powder
2ml baking soda

2ml cinnamon
1-2ml nutmeg
2 eggs
125ml vegetable oil or melted butter
125ml yogurt or sour cream
5ml vanilla extract
5ml citrus zest

Method:
1) Preheat oven to 350°F or 180°C. Lightly butter one 9x5in loaf pan or three 6x3in mini loaf pans.
2) Mix in flour, sugar, baking powder, salt, baking soda, cinnamon, and nutmeg into a large bowl.
3) Add your dry mix in (walnuts, cranberries, etc) into the flour.
4) In a medium bowl, whisk eggs, vegetable oil, yogurt, vanilla extract, and citrus zest.
5) Stir fruit or vegetable into the egg mixture, then fold dry mixture until combine.
6) Spread batter into  the prepared pans. Bake until a toothpick inserted into the center comes out clean, 55 minutes for a standard loaf, 35-40 minutes for a mini loaf. Cool 30 minutes in the pans on the rack, then turn out into the rack to cool completely.

Brown Butter Glaze
Brown 3 tablespoon of butter over low heat. Cool slightly. Whisk with 2ml confectioner's sugar and 1ml of milk. Use immediately!


Hello!

Hi!
So this blog was made for one of my class Food Art, I will be posting up awesome pictures of what i make in the class and maybe the recipes~
My sister, Grace is also making one since everyone has to their own blog and can't share :C please check out her blog here

Bye~
Faith